Before we begin processing W-2's, we need to ensure that specific areas in CDM+ Payroll are properly setupset up. These areas include:
- Payroll Payer Records
- Deduction Setup
- Employee Records Setup and Housing Allowance Pay Item
...
- Click All in the lefthand sidebar to see all of the created payer records. Select the one you used to create your 2020 payroll.
- Ensure the Federal ID Number is correct.
Review Company information and make sure it is correct.
This information can- Review Contact information and ensure that it is correct. This can also be updated in the Aatrix Forms Viewer, but it will not be updated in CDM+.
Warning This information can be updated in the Aatrix Forms Viewer, however, this does not update the information in CDM+.
Note Also, ensure that the proper 941 Depository Frequency is selected. If you file a Schedule B form, then select 'Semiweekly'. In our example, the church does not file a Schedule B so 'Monthly' is selected.
- Review Contact information and ensure that it is correct. This can also be updated in Aatrix Forms Viewer, but it will not be updated in CDM+.
- Ensure a State is selected and the State's Tax ID is correct.
...
Select the 403-B deduction in the Results list.
- Select All
- Select the '403-B Deduction' in the Results List.
Ensure the W-2 Field is correct for any deductions that will show on W-2s.
You will also want to review other W-2 related deductions and ensure that the proper W-2 field is selected. You can contact your Tax Professional for this information.
...
Tip You can perform a simple search to find a specific deduction, by clicking on the Find option in the lefthand sidebar.

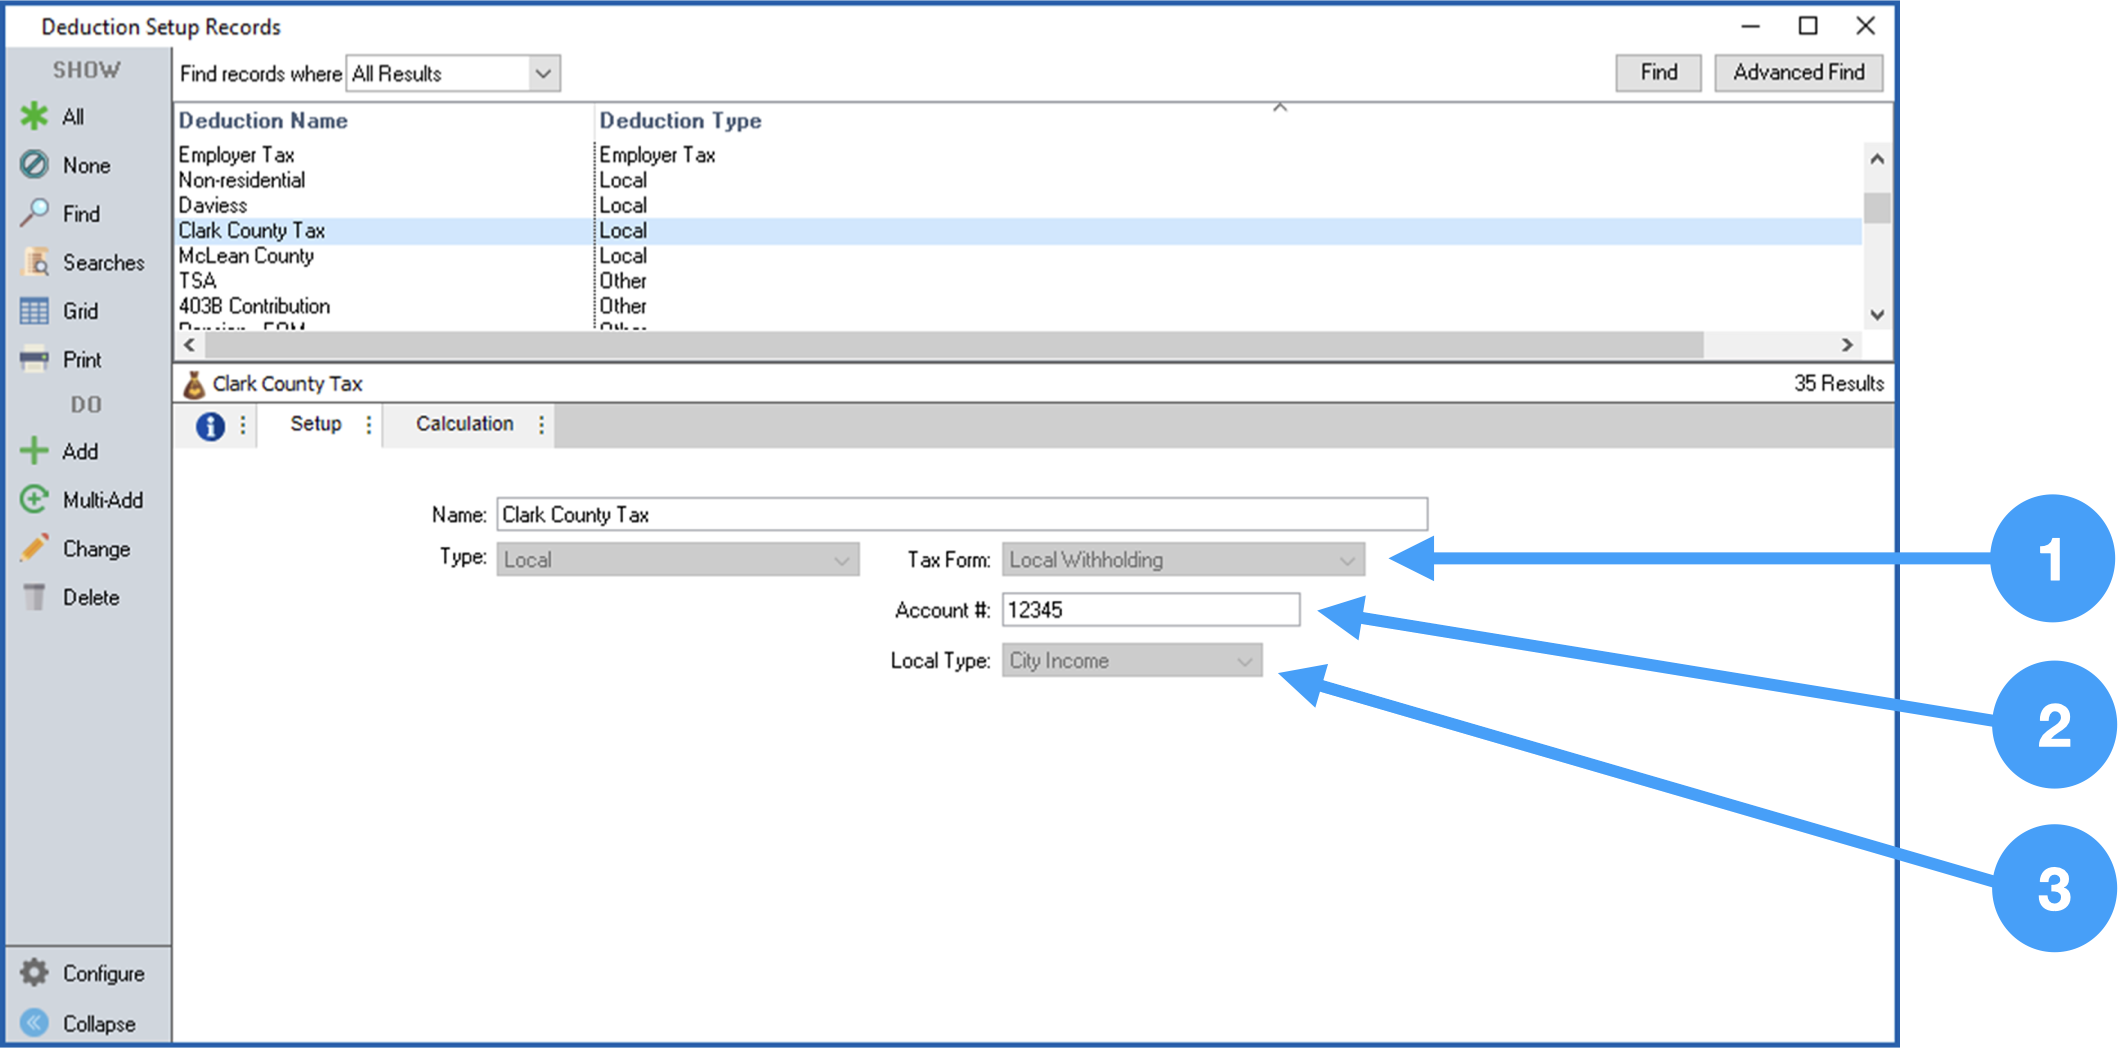
Example: Local Tax Setups
...
- Ensure the Tax Form field is set to 'Local Withholding'.
- Ensure the correct local tax account number is entered.
- Ensure the correct Local Type is selected.
| Note | |||
|---|---|---|---|
| title | Review all | Deductions to be included deductions that will be reported on your W-2's | You may have other deductions that require to ensure that the W-2 Field to be populated. Make sure you review all of your deductions in the Deduction Setup window before processing your W-2'sfield has the appropriate option selected. Contact a Tax Professional if you are unsure of the appropriate selection. |
Review Employee Record Setup
| Doc path | ||
|---|---|---|
|
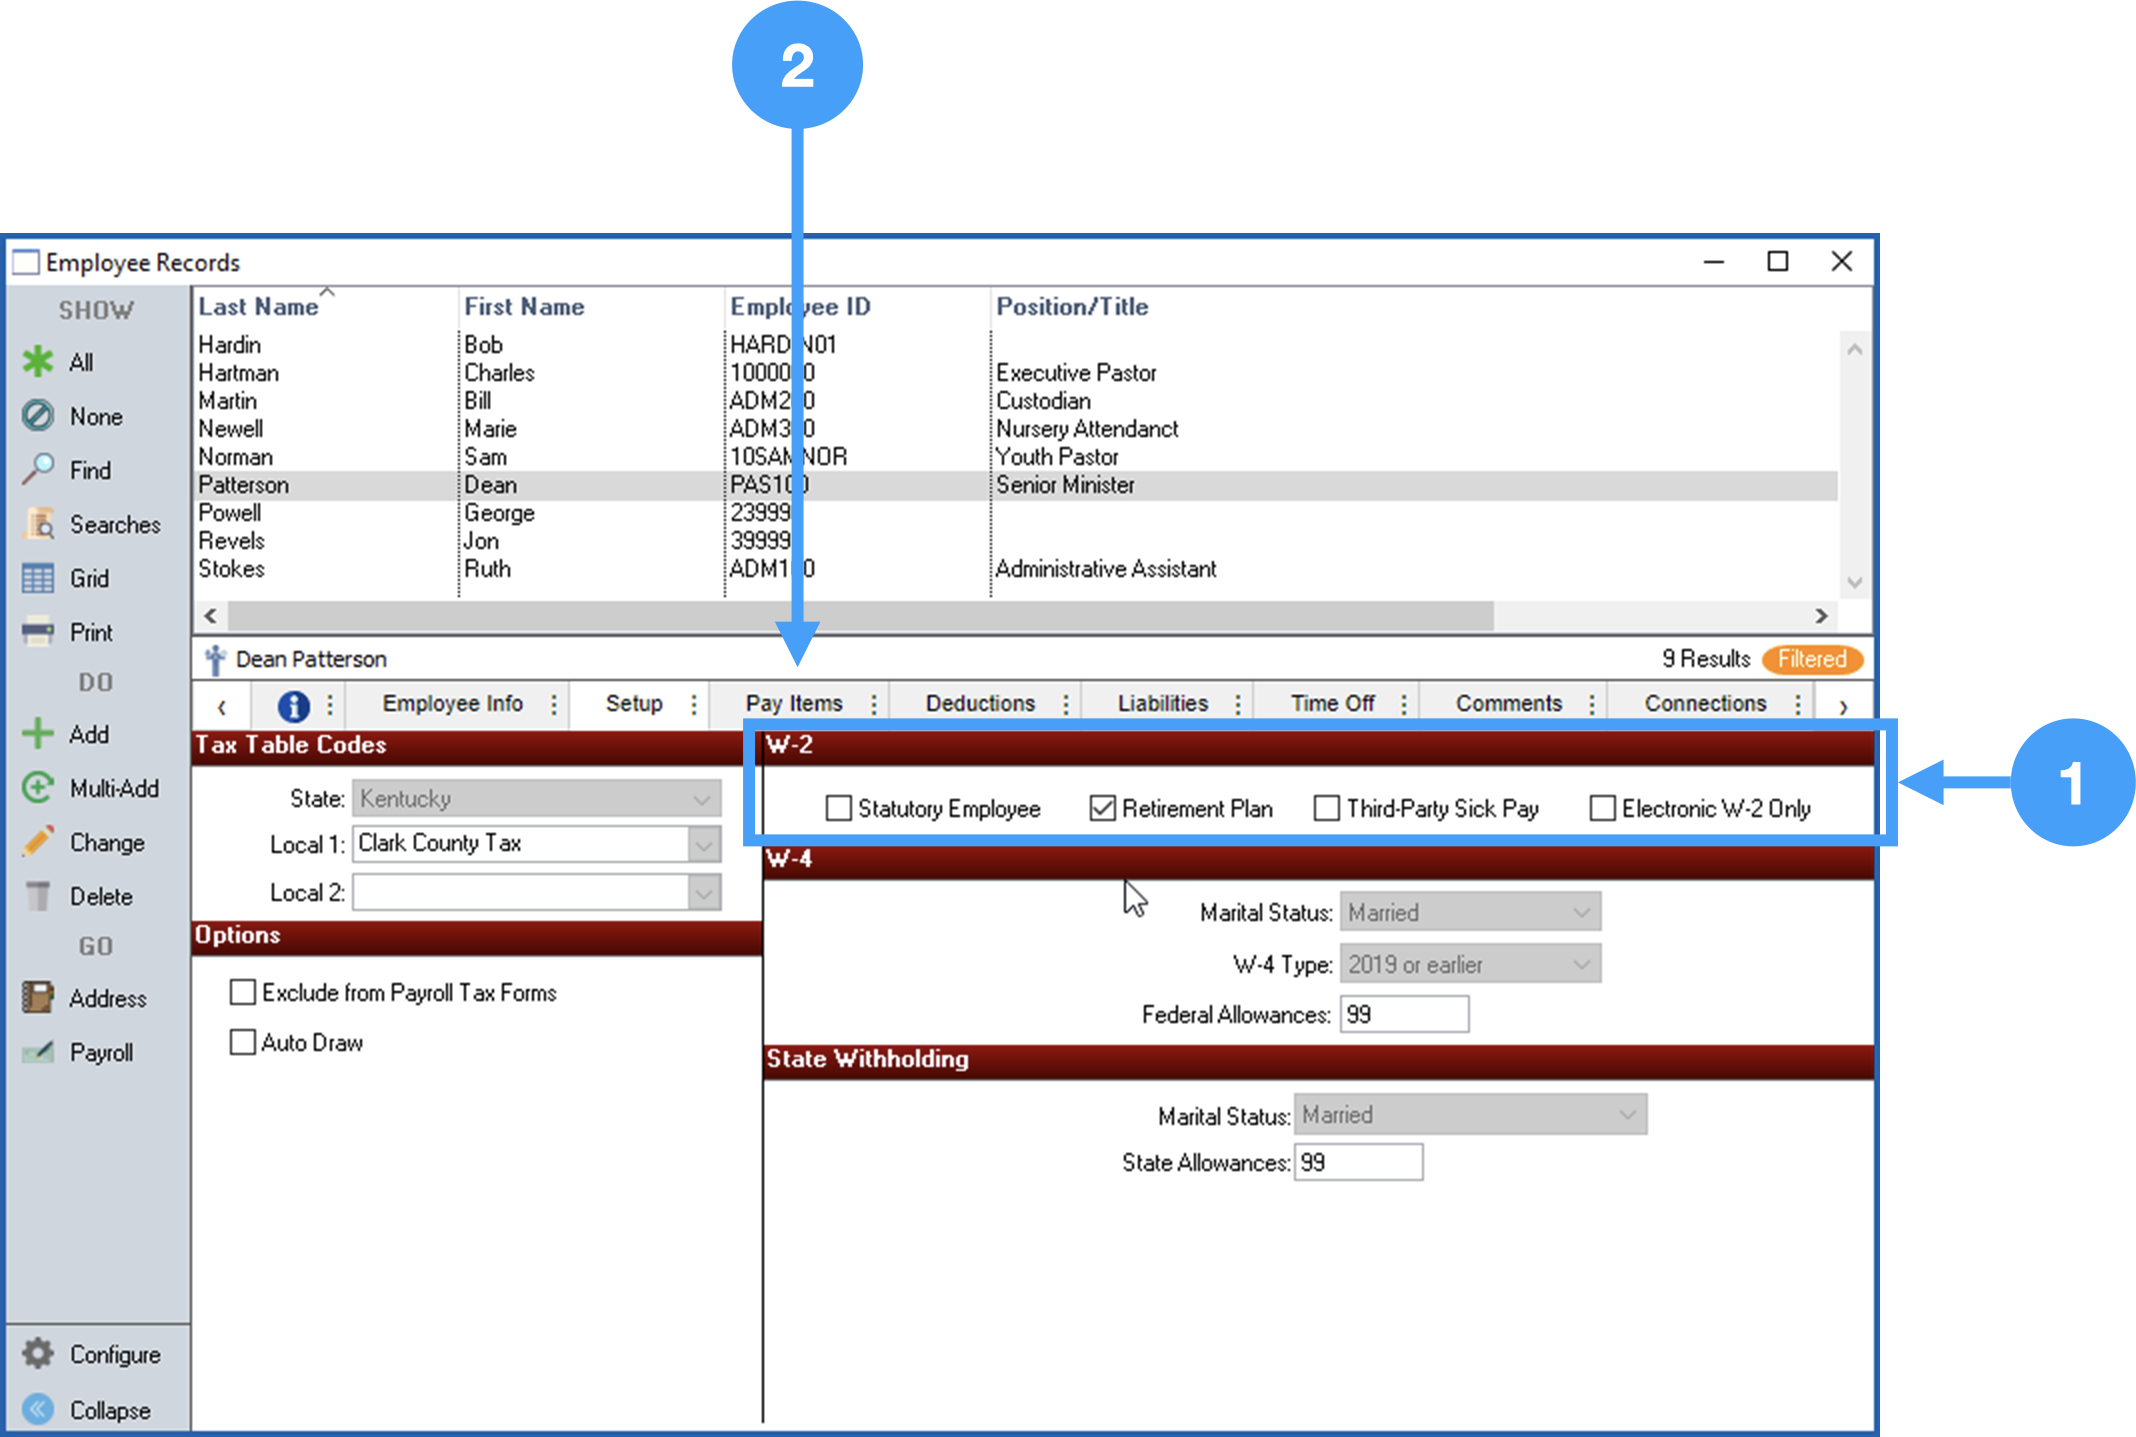
- Select an employee to review.
- Select the Setup tab.
Review the information under the W-2 section of the Employee Records Setup tab. For example, if an employee is contributing to a retirement plan, then the checkbox labeled 'Retirement Plan' must be checked. In additionAlso, if there are employees who have elected to receive their electronic W-2's electronically, then the checkbox labeled 'Electronic W2 Only' must be checked.
Note The Electronic W2 Only option requires that you have signed authorization forms for each employee electing to receive electronic W-2's only. NOTE: NO paper W-2's are generated when this is selected.
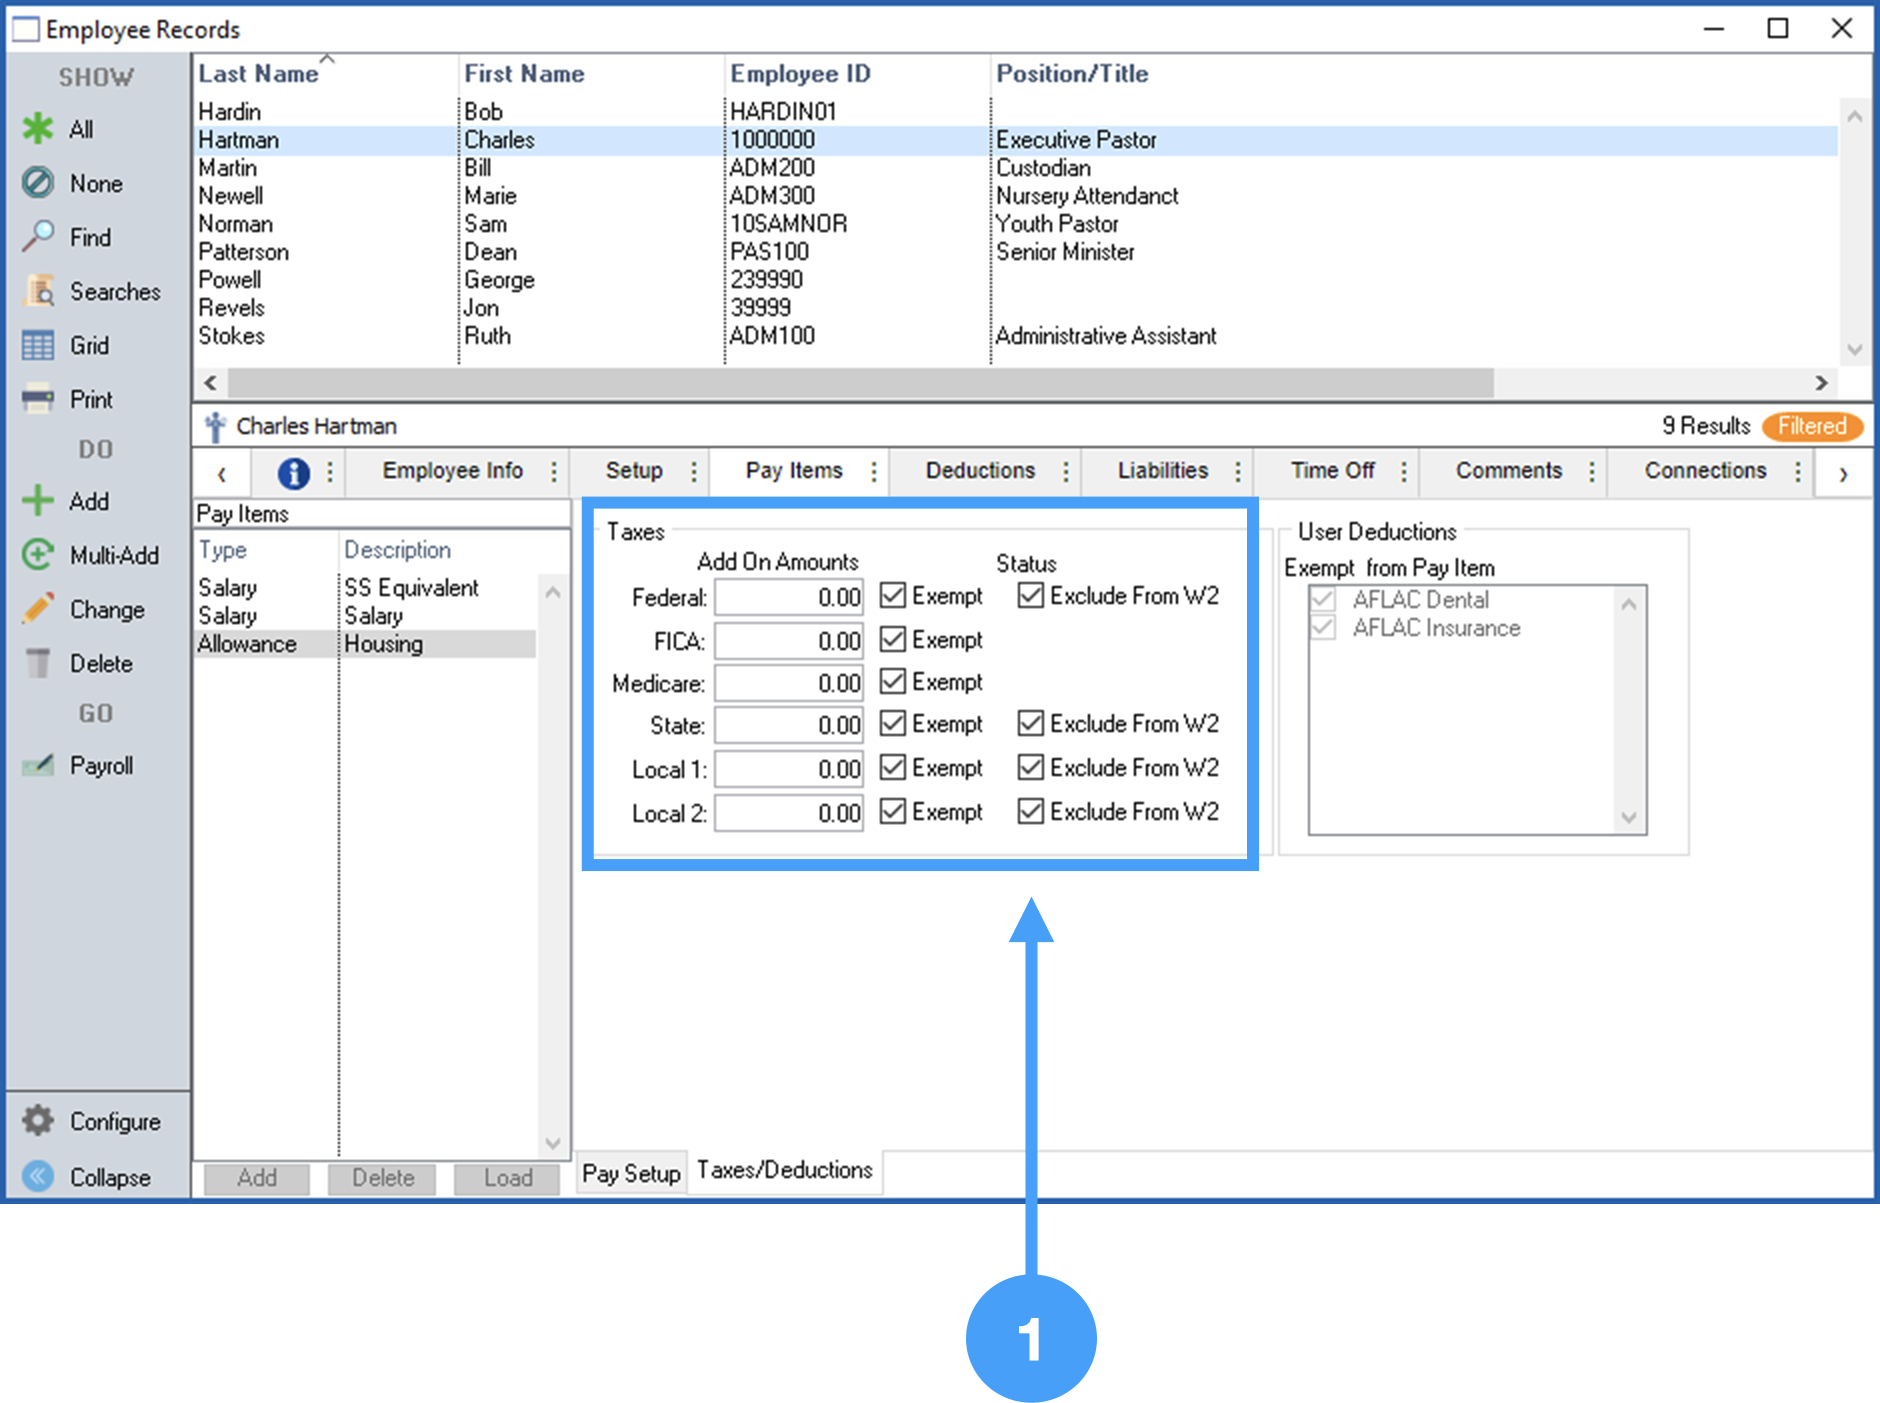
- Now, let's look at the Housing Allowance Pay Item. Click on the Pay Items tab.

Review Employee Record Housing Allowance Pay Item W-2 Field Setup
...
Review Employee Record Housing Allowance Pay Item Setup
- Review of the information under Status is important to ensure the employee's Housing Allowance is properly setup. Housing Allowance should have all Tax items
Ensure all Tax Items are set to 'Exempt' and all of the checkboxes for 'Exclude from W-2'
should be checked for all items. The 'Exclude from W-2' is especiallyunder Status are checked.
Note Ensuring that the checkboxes under Status are checked is critical. If these checkboxes are not checked, then the Housing Allowance will be included in Box 1 of the W-2 and not Box 14.
Begin the W-2 Process
With the above items reviewed, we are ready to begin the processing of this year's W-2's.
...